 9571
9571
Administrator Access
IMPORTANT: Before you begin, please make ensure you are logged in as an administrator or have the administrator credentials ready. Your mac will need administrator privileges to install Adobe Connect.

Downloading Adobe Connect
To begin installing Adobe Connect go to https://helpx.adobe.com/adobe-connect/connect-downloads-updates.html and make sure to download the Mac version.

The install file will download to your default downloads folder. Double click to open the installer.

Double click on the installer to begin the install.

Your mac may ask for permission and a password to install. Please grant the permission and input your password.


Adobe Connect will begin installing. Once it is finished it will have automatically added Adobe Connect Classic to your app bar.
Removing Adobe Connect Classic
In order to properly use Adobe Connect, you will need to remove the Classic app and add the current (newer) application. First, drag the Adobe Connect Classic Application to the trash icon.

Find the Adobe Connect folder in your Applications folder and open it.

From here you will see the Adobe Connect and Adobe Connect Classic App. Drag the Adobe Connect app to your desktop and the Classic app to the trash.

Double click the Adobe Connect app from your app bar.
Note: It may take a few seconds for the app to open, it will bounce around in the meantime.

Opening Adobe Connect for the First Time
The first time you open Adobe Connect it will show a blank screen with a place to put a link. Copy and past your meeting link here.

You will be redirected to an Adobe Connect login page. Please put in your mykolbe.org email in the username field.

Once you enter into the password field you will be redirected to a Kolbe login page. Please login using your mykolbe.org credentials.

You will then be redirected to the meeting room.

Note: To get into different rooms you may need to copy and paste the link into the Adobe Connect application. After you have logged in for the first time, Adobe will show a list of your recent rooms and show that you are logged in.
Allowing Adobe Connect Camera and Microphone Access
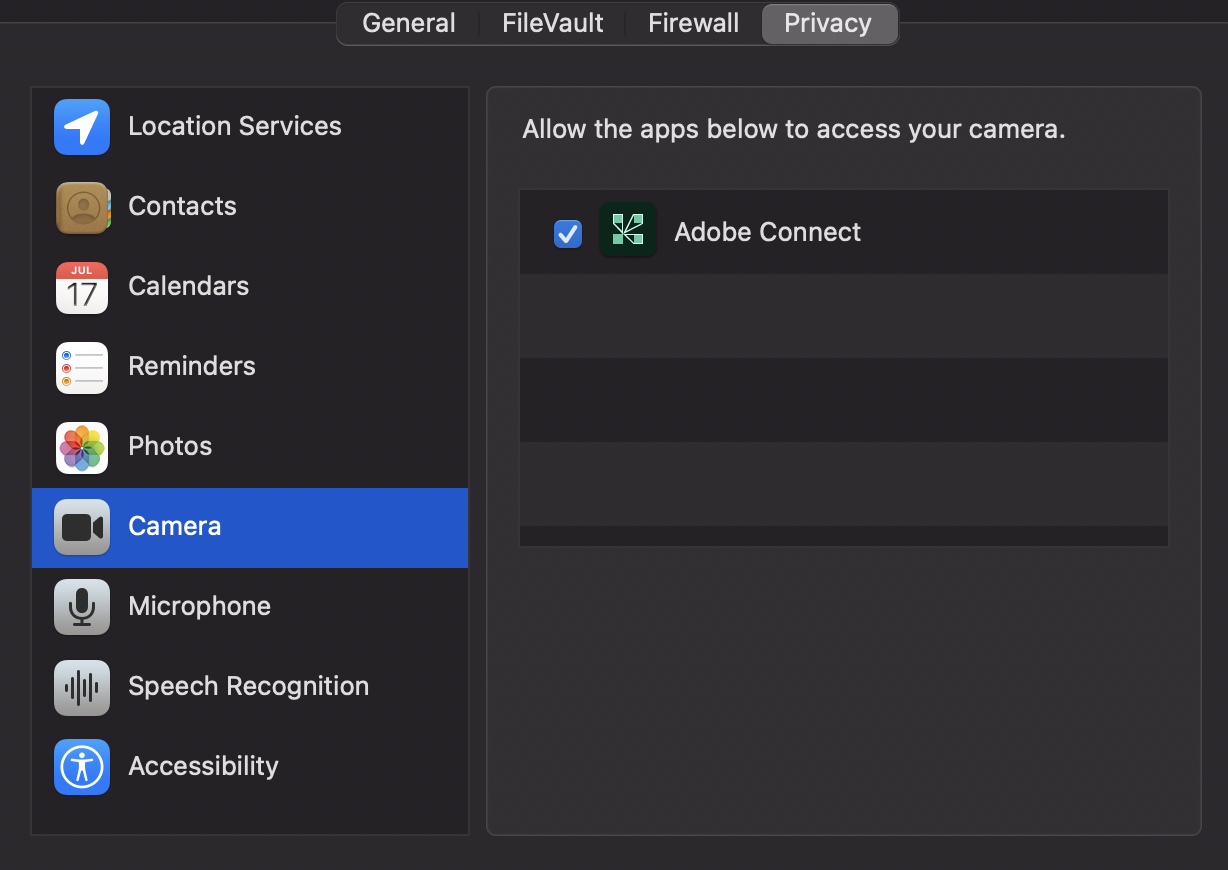
IMPORTANT: In order to use your microphone and video camera properly in Adobe Connect, you will need to allow Adobe permission from your privacy settings.
Go to System Preferences and find Security & Privacy.

In Security & Privacy go to Privacy, then look for the Camera and Microphone options.

Ensure that Adobe Connect is given access to the Camera and Microphone.


